Deployment Overview
This document describes how to set up AuthPoint multi-factor authentication (MFA) for Active Directory Federation Services (ADFS) with high availability and multiple Microsoft 365 domains. In this configuration, AuthPoint is the identity provider.
ADFS must already be configured and deployed before you set up MFA with AuthPoint.
Integration Summary
The hardware and software used in this guide include:
- ADFS v4.0
- Windows Server 2016
- Microsoft 365
- WatchGuard Cloud
ADFS High Availability Authentication Data Flow with AuthPoint MFA
AuthPoint communicates with the AuthPoint agent for ADFS for Multi Factor Authentication. This diagram shows the data flow of an MFA transaction for ADFS with high availability and multiple Microsoft 365 domains.

Before You Begin
Before you begin these procedures, make sure that:
- End-users can log in to ADFS
- You have an Microsoft 365 global administrator account
- You have available AuthPoint user licenses for your Active Directory users
- You have an AuthPoint identity provider (IdP) certificate (go to Certificate Management)
Configure AuthPoint
- Log in to WatchGuard Cloud.
- From the navigation menu, select Configure > AuthPoint.If you have a Service Provider account, you must select an account from Account Manager.
- You must configure and install a primary and secondary Gateway. For detailed instructions to configure AuthPoint Gateways, see About Gateways.
- From the AuthPoint navigation menu, select Resources.
- From the Choose a resource type drop-down list, select ADFS. Click Add.
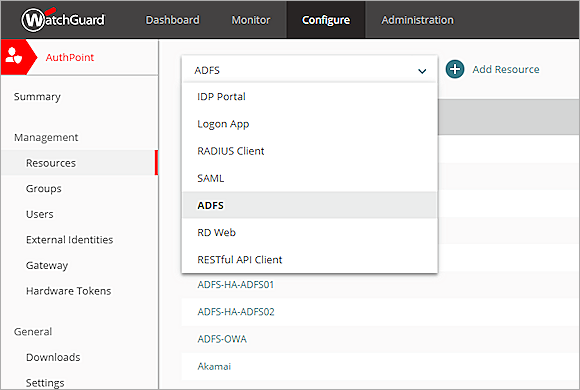
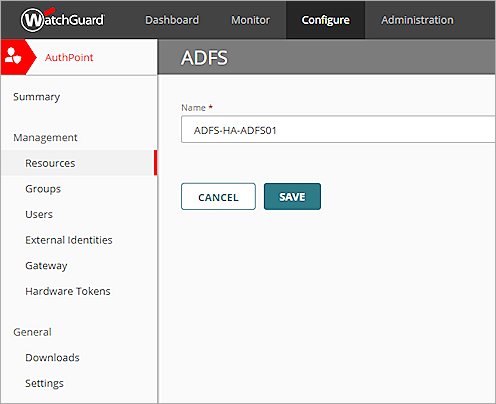
- Repeat Steps 4—7 to create another ADFS resource.
- If you do not have a group, you must add one now.
- From the AuthPoint navigation menu, select Groups.
- Click Add Group.
The New Group page appears. - In the Name text box, type a descriptive name for the group.
- (Optional) In the Description text box, type a description of the group.

- Click Save.
Your group is listed on the Groups page.
- From the navigation menu, select Authentication Policies.
- Click Add Policy. If you already have existing authentication policies, you can edit an existing authentication policy to add your ADFS resources to that policy. In our example, we add a new authentication policy.

- Type a name for this policy.
- From the Select the authentication options drop-down list, select Authentication options and select which authentication options users can choose from when they authenticate.

- Select which groups this policy applies to. You can select more than one group. To configure this policy to apply to all groups, select All Groups.
- From the Resources list, select both of your ADFS resources. These are the resources that this policy applies to. To configure this policy to apply to all resources, select All Resources.
Both ADFS resources must be added to the same authentication policy.
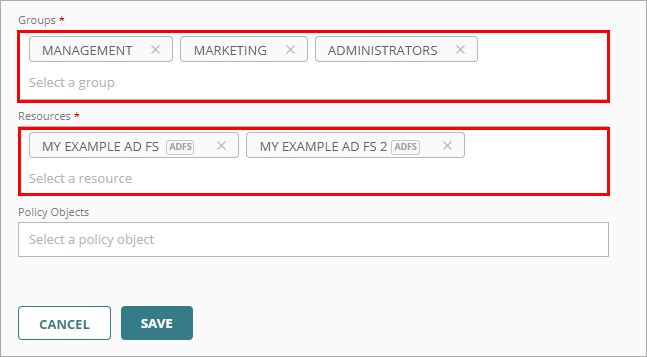
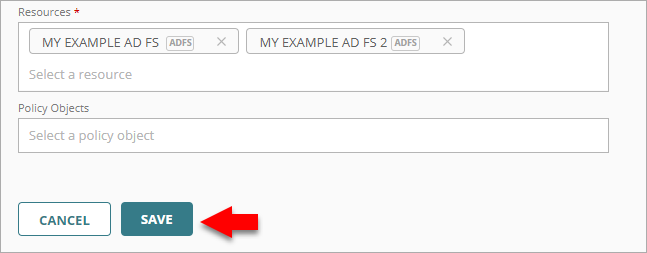
- Click Save.
Your policy is created and added to the end of the policy list.When you create a new policy, we recommend that you review the order of your policies. AuthPoint always adds new policies to the end of the policy list.
- From the AuthPoint navigation menu, select Gateway.
- Click the name of your primary Gateway to edit it.
- In the ADFS section, from the Select an ADFS resource list, select both of your ADFS resources to add them to the Gateway.
- Click Save.
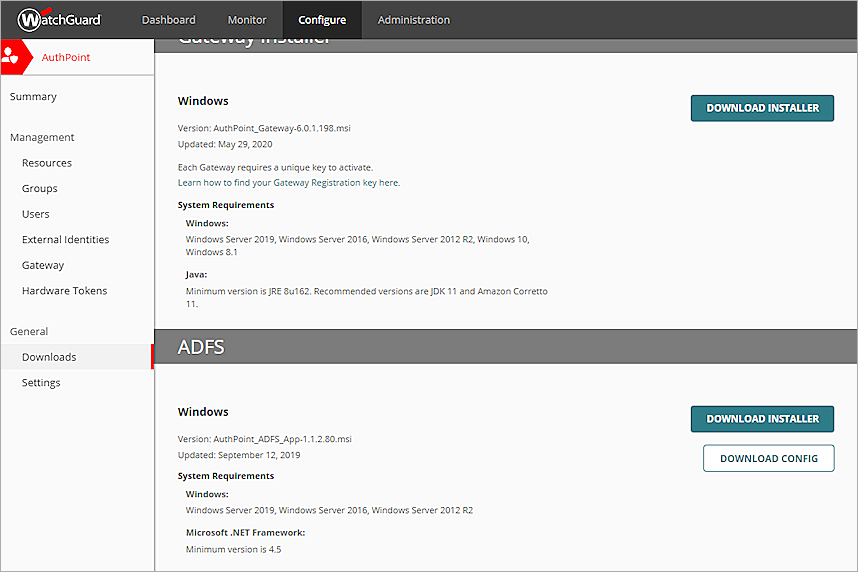
- From the AuthPoint navigation menu, select Downloads.
- In the ADFS section, click Download Installer and Download Config. You must have an ADFS resource and your installed Gateway must be version 4.0.0 or higher to download the configuration file.
You must download the configuration file for each ADFS resource.
- Open the configuration file for each of your ADFS resources and manually add the IP address for your secondary Gateway. The format for this is
,{"ip":"<secondary Gateway IP address>","port":9003}.Below is an example of our configuration file before and after we IP address of the secondary Gateway has been added. In our example, the IP address of primary Gateway is 192.168.86.39 and the IP address of our secondary Gateway is 192.168.77.15.
Initial configuration file content
{"accountId":"<your account id>","resourceId":<your resource id>,"resourceName":"<your resource name>","agentAddresses":[{"ip":"127.0.0.1","port":9003},{"ip":"192.168.86.39","port":9003}]}
Configuration file after we add the IP address of the secondary Gateway
{"accountId":"<your account id>","resourceId":<your resource id>,"resourceName":"<your resource name>","agentAddresses":[{"ip":"127.0.0.1","port":9003},{"ip":"192.168.86.39","port":9003},{"ip":"192.168.77.15","port":9003}]}
- Move the ADFS agent installer and one of the configuration files to each of your ADFS servers. Make sure the installer and the configuration file are in the same folder.
The two ADFS configuration files are unique. Make sure each ADFS server has a different configuration file.
- Run the installer on the first ADFS server to install the ADFS agent. Do not install the agent on the second ADFS server yet.
- Once the ADFS agent in installed on the first server, go the secondary ADFS server and run this PowerShell command as an administrator:
Set-AdfsSyncProperties -Role "PrimaryComputer".This command changes the secondary ADFS server the primary ADFS server. You must do this because the AuthPoint agent for ADFS can only be installer on the primary ADFS server.
- Run the installer on the second ADFS server to install the ADFS agent.
- When the ADFS agent is installed, run this PowerShell command to change the ADFS server role back to secondary.:
Set-AdfsSyncProperties -Role "SecondaryComputer" -PrimaryComputerName "<FQDN of primary server>".
Configure ADFS
Before we enable AuthPoint MFA for ADFS, we need to integrate ADFS with Microsoft 365. In this guide, we run commands on the ADFS server so that we do not have to run extra commands to connect ADFS. You can also run these commands on your Active Directory server, but that requires additional commands to connect ADFS.
- Refer to Connect with the Microsoft Azure Activate Directory Module for Windows PowerShell to prepare your environment for identity federation.
- Launch the Windows Azure Active Directory Module for Windows PowerShell that you configured in the previous step. Type
Connect-MsolServiceto log in with your Microsoft 365 Administrator Credentials.The default domain and initial domain in Microsoft 365 cannot be federated. You must register another domain with Microsoft 365 or follow the Microsoft guidelines to connect an existing domain to the Microsoft 365 service. The configured domain can then be used when you configure AuthPoint. In this integration, you need to prepare at least two different domains to be verified on Azure AD.
- Type
Get-msoldomainto return the status of domain. Make sure that the status of your domain is Verified and Managed. - Run this PowerShell command for your first domain, then run the command again for your second domain:
Convert-MsolDomainToFederated -DomainName <your domain name> -SupportMultipleDomain. - Now you have a Federated relationship between your ADFS and Azure AD, all users with a federated domain suffix that log in to Microsoft 365 are redirected to ADFS for authentication.
- Open ADFS Management.
- Select Service > Authentication Methods.
- In the Multi-factor Authentication Methods section, click Edit.
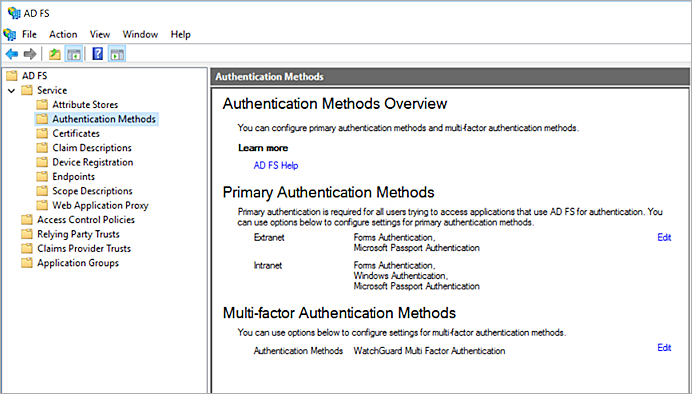
- In the Edit Authentication Methods window, select WatchGuard Multi Factor Authentication. Click OK.

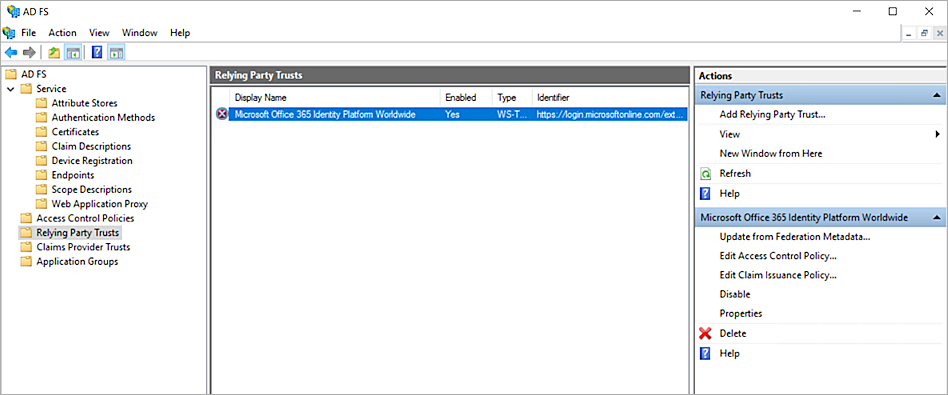
- Select Relying Party Trusts.
- Right click on the trust for your Microsoft 365 resource and select Edit Access Control Policy. If this is the first time you have use this portal, you must click Use access control policy in the window that opens.
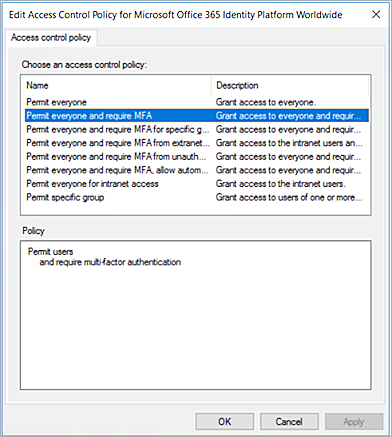
- Select Permit everyone and require MFA. Click OK. You can also customize your policy based on your organization requirements.
Synchronize Users from Your Active Directory
You must sync your on-premise AD users (which you will sync to Azure AD) to AuthPoint so that the users can be recognized by ADFS, Microsoft 365, and AuthPoint.
- To sync users to AuthPoint from Active Directory, you must add an external identity in AuthPoint. External identities connect to user databases to get user account information and validate passwords. For detailed instructions, see Sync Users from Active Directory or LDAP.
- You also need to sync your on-premise Active Directory users to Azure AD with the Azure Active Directory Connect tool to make sure the users are same in AuthPoint, Azure AD, and your on-premise Active Directory. For detailed instructions, see Sync Users from Active Directory to Azure Active Directory.
Test the Integration
To test AuthPoint MFA for Microsoft 365 and ADFS with high availability, you can authenticate with a mobile token on your mobile device with any method (push, QR code, or one-time password).
In this example, we show the push authentication method (users receive a push notification in the mobile app that they must approve to authenticate).
- In a web browser, go to the Microsoft 365 URL.
- Type your email address. Click Next.
You are redirected to the ADFS SSO page. - Type your password.
When the authentication for the first factor is complete, you are redirected to the AuthPoint authentication page. - Click Send Push.
- Approve the authentication request that is sent to your mobile device.
You are logged in to Microsoft 365.

